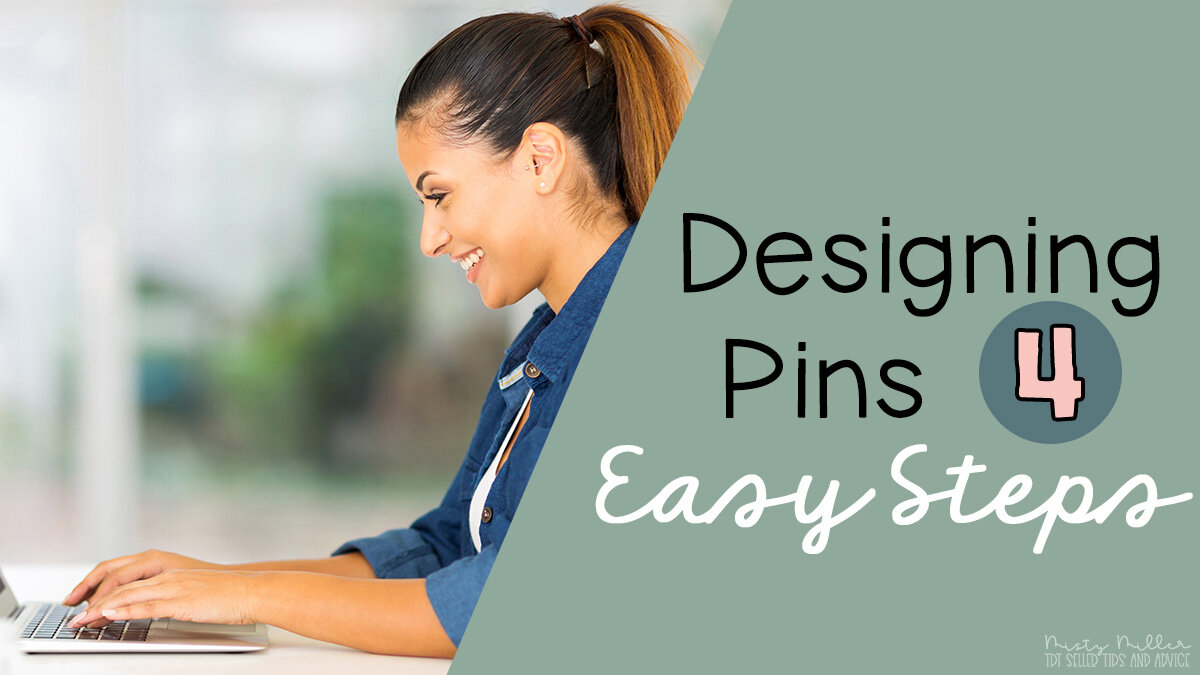
Attractive Pins You can Actually Create in 4 Easy Steps
You finally had time to sit down and finish your resource. You have it uploaded to TPT and you give yourself a high five. Now you wonder how people are going to see it.
You know Pinterest is a good option for getting views on your resources. But that means you have to spend a great deal of time creating more images and pins. You just finished a cover that took you ages to do.
You start thinking about your favorite binge-watching show. It calls to you. You could spend more time and create a pin or maybe you'll just not bother this time and go watch your show.
What should you do?
What if I told you designing pins for Pinterest is really not complicated and shouldn't take you a lot of time? Plus you will still have time for that favorite show!
It's true! There are only 4 things you need to do when designing pins.
Before we get started with the "how to", many sellers want to know why they can't pin their product covers. Well, you can do that and it works fine for some sellers. I don't recommend it because it isn't the preferred Pinterest size.
Wait...Pinterest has a preferred size?
Yes! Read on my friend. ☺
Step 1: Software and Size
1) Choose your preferred pin-making software. Some suggestions include
⇒ PowerPoint
⇒ KeyNote
⇒ Photoshop
⇒ Illustrator
⇒ Canva
⇒ directly on Pinterest - very limited so I don't recommend
⇒ Tailwind - creation tool is in beta right now
2) Set your page size to a 2:3 ratio. This is the preferred pin size whether you create regular pins, video pins, or carousel pins. You can do something like 6 inches by 9 inches or 8 inches by 12 inches. In pixels that would be something like 1000 pixels by 1500 pixels. At last check, Canva has this template already set to 1000 px by 1500 px.


So we now have a program and have it set up for the preferred size. Now what?
Step 2: Images
1) You need at least one image. You can have multiple images if you want. Just don't let it get too busy.
2) Choose an image that would get their attention. Think about colors that would pop, various angles, good lighting, etc. You can use
⇒ a photo you've taken of the resource
⇒ a commercial use stock photo representing or relating to the topic
⇒ digital images or screenshots along with a stock photo or plain background
✢ If you want more information about video pins, go to my post How to Make a Video Pin for Pinterest.
Pin Using Photograph of Product, Easy to Read Fonts, Minimal Extra Text, Logo
Step 3: Text
1) Add a bit of text that can easily be read.
☞ I did not say a LOT of text! ☜
I like to add my title and maybe a bit of a subheading. Too much text
⇒ can be overwhelming
⇒ could cover up all of your product image
⇒ could get too small to be read easily
2) Keep in mind fonts matter! This isn't the time to use your really cute fonts that are hard to read in a small size. Test a few different ones out to be sure they are readable. You don't want to make it difficult for the person looking to read your text. Help them out and keep your text simple.
3) Be sure the font color is easy to see and doesn't blend in with the background. You may want to put a block of color behind your text to help it stand out.
Pin Using Stock Photo, Easy to Read Fonts, Logo, Website URL
Step 4: Identify Yourself
1) Add your identifying mark(s). This could be
⇒ your logo
⇒ your name
⇒ your website URL
⇒ your TPT URL

Pin Using Stock Photo and Screenshot of Product, Easy to Read Fonts, Minimal Extra Text, Logo
That's it! You don't need anything complicated.
Once your pin is completed, you can upload it to Pinterest. Check out Pinterest Tips Part 3 to see how.
You might be thinking, "I'm not a good designer. I'm not creative enough to do this."
My response: YOU CAN DO THIS!

It does take some practice. TEMPLATES are a great option when creating pins. The pin designs for my resources are reused as templates.
You can also find pin templates on sites like Canva. They are free to use. The templates may have paid elements or images on them. You can either pay for those items or delete them and use your own.
It's time for you to start making some eye-catching pins. They really don't take long and are easy to make if you keep things simple. And you'll still have time for some binge-watching of your favorite show after you create a few pins. ☺
Interested in some free Canva pin templates? Sign up below. Don't forget to confirm your email in order to receive the link!

